DIY – Clap Switch Electricity Kit – Tested & Verified (Educational projects and learning DIY kit)
| Component | Specification |
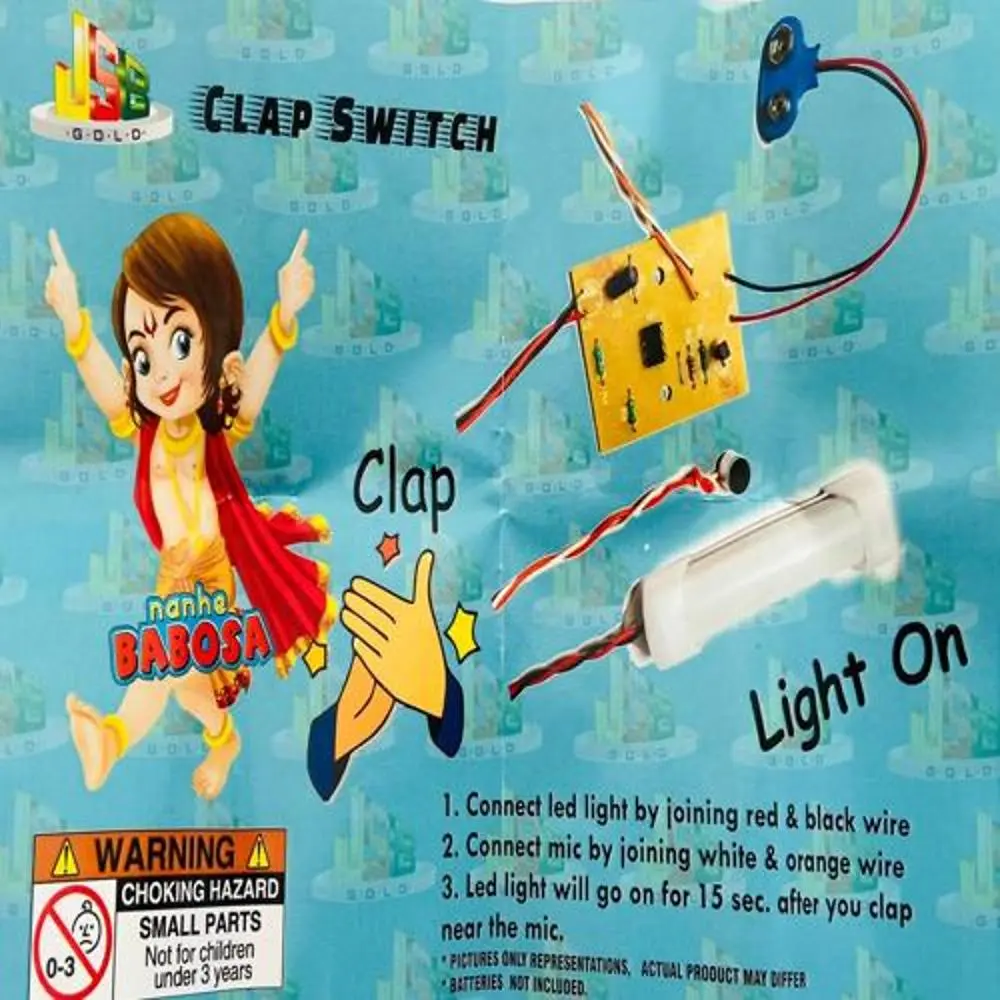
| Detection Type | Acoustic (Sound Sensitive) |
| Microphone | High-Sensitivity Electret Condenser Mic |
| Switch Duration | ~15 Seconds (Auto-Off) |
| Output Indicator | High-Brightness LED Tube/Light |
| Power Source | 9V Hi-Watt Battery (Included with Connector) |
| Circuit Type | Transistor-Based Switching Circuit |