Product Description & Technical Details
Product Description
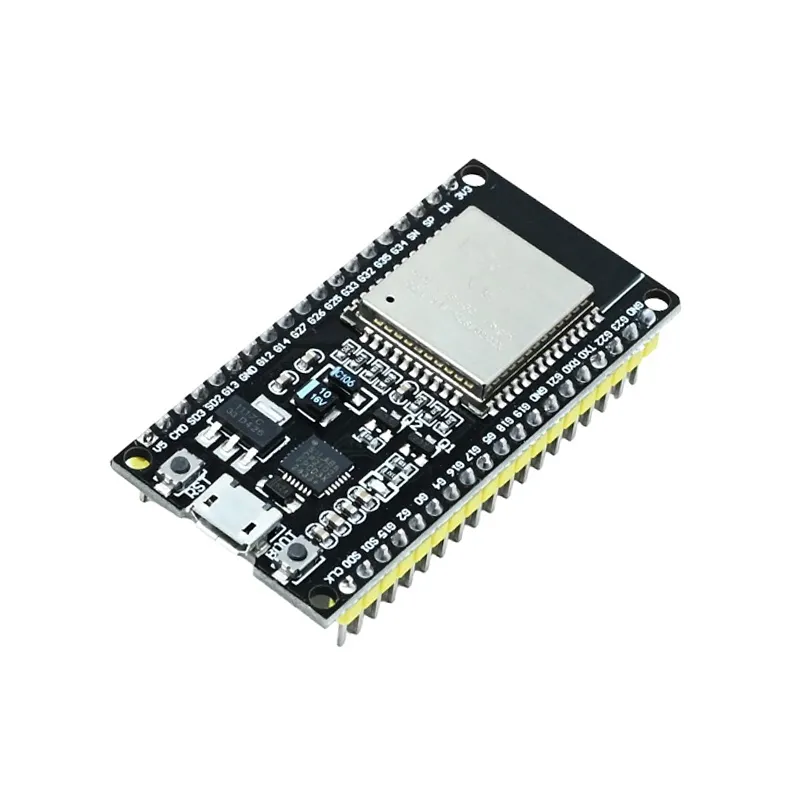
The 38-Pin ESP32 Development Board is a high-performance, ultra-low-power IoT platform designed for developers who need maximum flexibility. This version breaks out 38 pins of the ESP-WROOM-32 module, offering more GPIO access than the standard 30-pin variant. It is powered by the dual-core Xtensa® 32-bit LX6 microprocessor, allowing you to run a full WiFi stack on one core while keeping the second core entirely free for your application logic. Whether you are building an industrial sensor gateway, a high-fidelity audio streamer, or a sophisticated home automation hub, this 38-pin DevKit provides the processing power and extensive I/O required for professional-grade projects.
Key Highlights
Extended GPIO Access: The 38-pin layout exposes more internal functions of the ESP32, including additional touch sensors and hardware serial ports that are often hidden in smaller boards.
Dual-Core Efficiency: Reach clock speeds up to 240 MHz with two individually controllable cores, enabling true multitasking and high-speed data processing.
Advanced Wireless Stack: Integrated 2.4 GHz WiFi and dual-mode Bluetooth (Classic and Low Energy) allow for seamless cloud connectivity and local device pairing.
Ultra-Low Power Consumption: Engineered for battery-operated devices with multiple power-saving modes, including a deep-sleep mode that draws negligible current.
Robust Prototyping: Features a built-in reset button and a boot button, with high-quality 2.54mm pitch headers that are compatible with specialized expansion shields.
Technical Specifications
SRAM: 520 KB
Clock Frequency: Adjustable from 80 MHz to 240 MHz
Input Voltage: 5V (USB) or 5V-12V (VIN)
Digital I/O Pins: 32 (Approx.)
Security: WPA/WPA2/WPA2-Enterprise/WPS
Interfaces: 3x UART, 3x SPI, 2x I2C, 12x ADC, 2x DAC
Dimensions: ~55mm x 28mm
Installation Tip from Robogears
Because the 38-pin ESP32 is wider than the 30-pin model, it will occupy most of the space on a standard half-size breadboard, leaving little room for jumper wires. To avoid this, we recommend using a 38-pin ESP32 Expansion Shield or placing the board across two separate breadboards. In the Arduino IDE, select "ESP32 Dev Module" as your board type. If you have trouble uploading code, ensure your USB cable is a "data" cable and not just for charging; if the "Connecting..." message appears, hold down the 'BOOT' button on the module until the upload progress begins.
Note: The product images provided are for illustration purposes only. The actual product may vary slightly in terms of design, color, or component layout due to manufacturing updates, but technical specifications will remain as described.